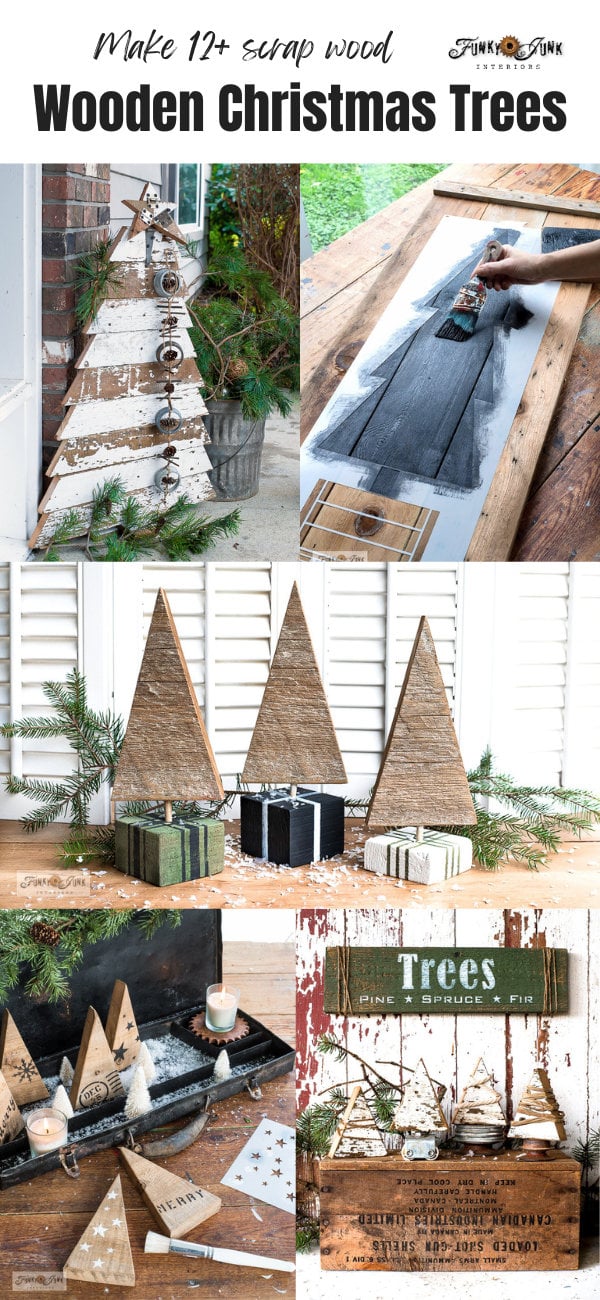
Love the look of wood Christmas trees? Here’s an easy way to create a pencil Christmas tree forest and to decorate them with the perfect sized stencils!
A current tradition of mine (or perhaps it’s more of an obsession!) is to come up with a cute and easy wooden artificial Christmas tree of sorts each holiday season.
I just love making wooden Christmas trees! They are perfect for small spaces, price efficient to make, offer easy storage, and a blast to customize!
You can bet there’s quite the collection going at this point! Here’s a couple of my favs:
Top pencil Christmas trees:
Wooden Christmas trees with present bases
Industrial wood Christmas trees with gear tree skirts
View 12+ wooden Christmas tree ideas in THIS POST
Those are really fun with lots of detail! However this round, I desired wooden slim Christmas trees, or rather, pencil Christmas trees that were a little simpler… with an easy way to decorate them this time!
View Pencil Christmas Trees stencil HERE
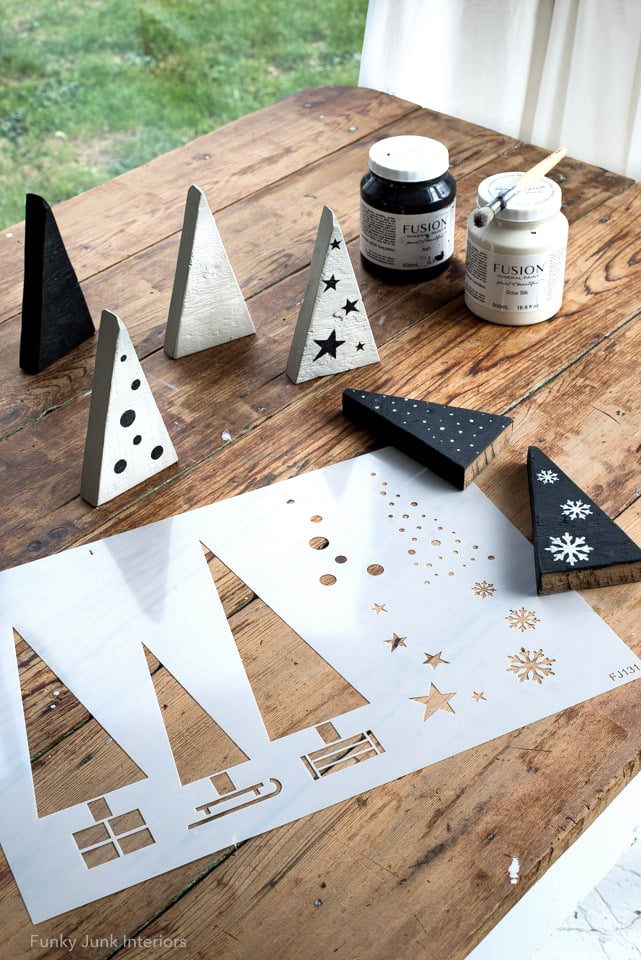
Pencil Christmas Trees stencil
Pencil Christmas Trees is a Christmas stencil where you can stencil and decorate a row of Pencil Christmas Trees (with or without their unique tree skirts!) or use the tree decorations on wood trees!
And you can bet I ensured the designs would fit a standard cut of wood from a cedar plank!
I can’t wait to play with this stencil more… however today’s project walks through how I decorated up cut wood scraps which fit this stencil so perfectly, making this a fast and easy project!
Plus, these trees were designed to go with something special which I’ll share lower down in the post…
Ready to make your own variation of decorated wood Christmas trees? You’ll love how easy these instructions with the help of the stencil make this! Here’s how to achieve the full look…
This post contains some affiliate links in which I earn a small percentage from qualifying purchases through these links, at no extra cost to you. Thank-you for helping to support my blog!
DIY wooden pencil Christmas trees
Supplies you”ll need:
Pencil Christmas Trees stencil from HERE
Fusion Mineral Paint in Raw Silk (warm white color)
Cutting the planks
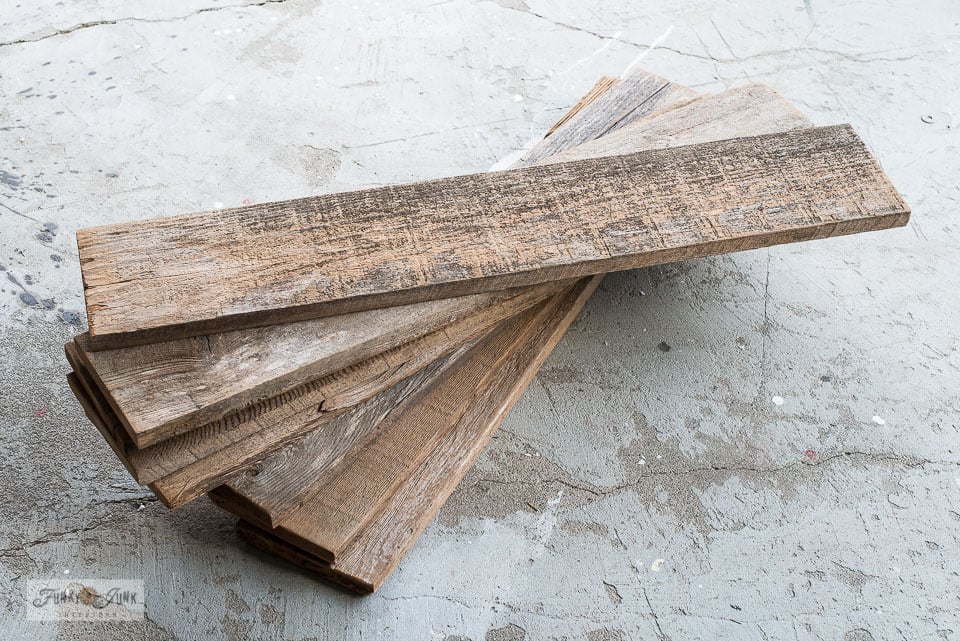
1. Choose some reclaimed wood that has a little thickness to it so the trees can stand up on their own.
Most any reclaimed wood plank will do! However if you wish to get the size of my trees, these cedar boards from an old fence measure 5.75″ deep x .75″ thick.
Using different sized boards will change the diameter of your tree bases which could also be a fun mix!
Cutting the tree shapes
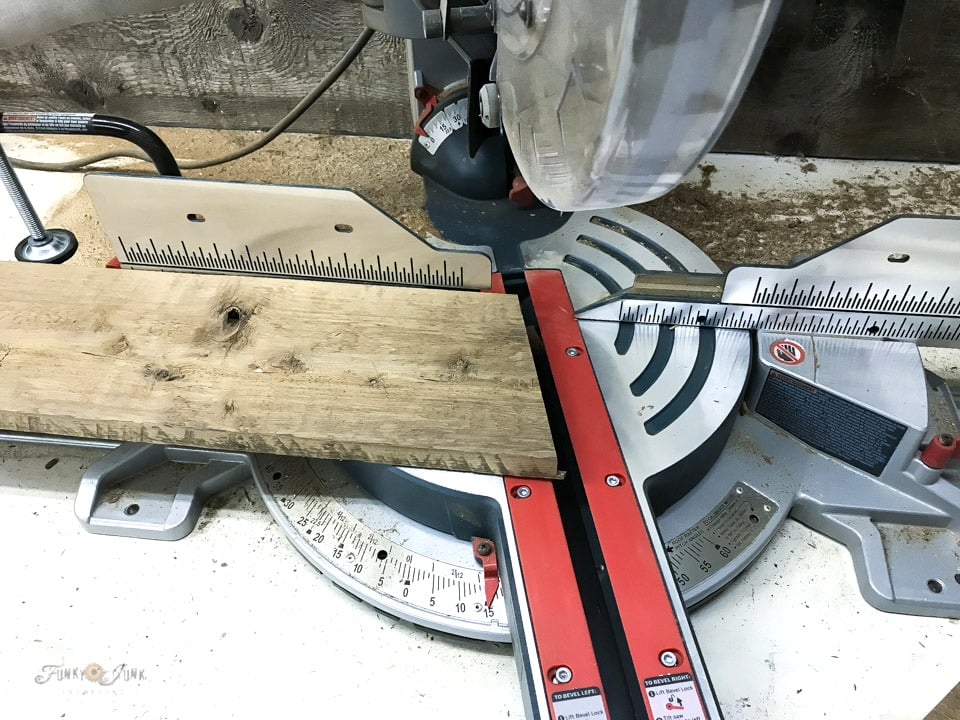
2. Using a miter saw, cut triangles out of the wood.
If you use boards with different depths, you’ll be able to achieve different tree heights.
a) Set wood in miter saw.
b) Position the blade to the desired angle. My trees were cut at 15 degrees to achieve a tall tree, slim tree or slim pencil Christmas tree look.
c) Make one cut.
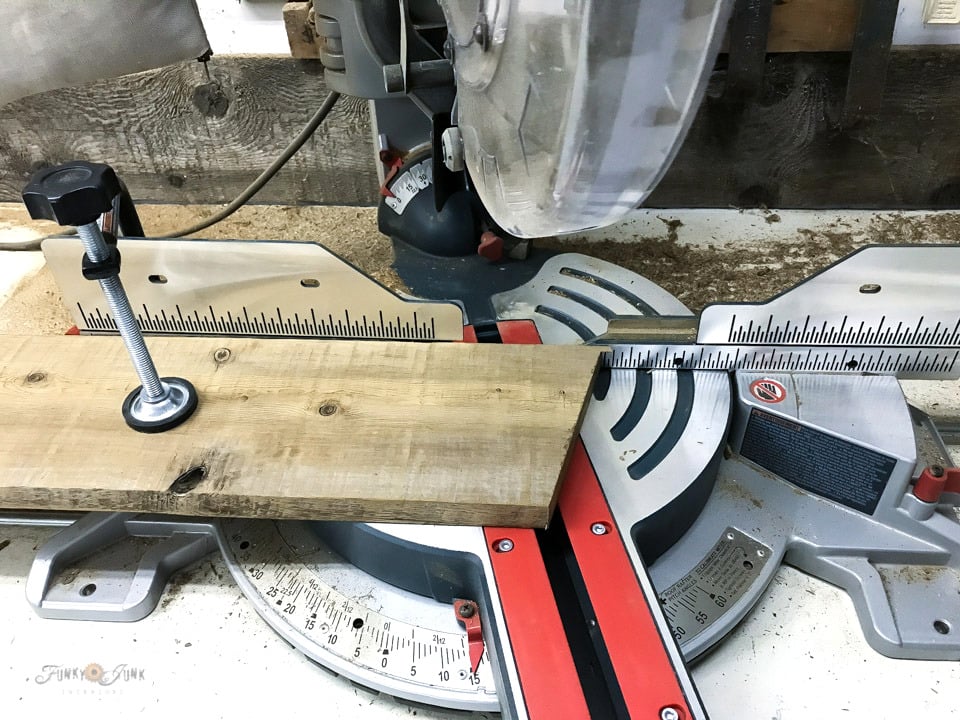
d) Flip the board over and reposition so your next cut will create a triangle.
You now have your tree!
e) Repeat feeding the board and flipping it over with each cut until you have all the trees desired.
Painting the trees
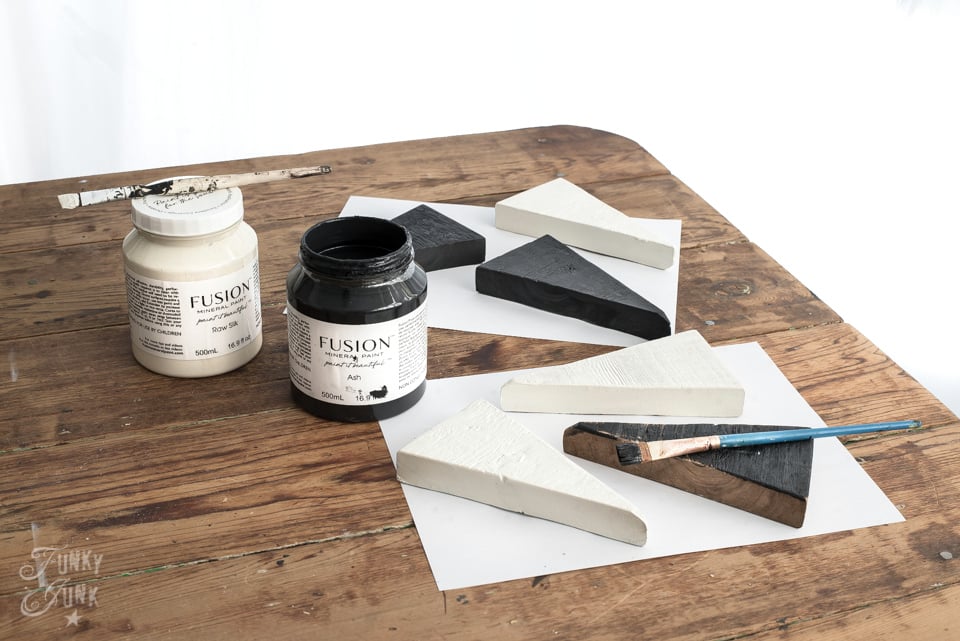
3. Paint or stain the trees as desired.
Since I was going for a black and white theme to match a similar style to another project, I painted my trees with Fusion Mineral Paint in Raw Silk (nice warm white colour) and Ash.
All sides were painted, including front, back and edges using a wider tipped artist’s brush.
Purchase online HERE to get 10% off all Fusion products!
Stenciling the designs
4. Decorate the wood trees with contrasting colours and designs, leaving some trees plain.
Decorating these trees was a snap, thanks to the stencil images designed in tree shapes!
- Position Pencil Christmas Trees tree designs over a wood tree.
- Dip stencil brush into paint and remove most onto a rag until brush feels dry.
- Tap the paint through the stencil image to achieve the effect desired.
Aren’t they just the cutest? I’m really loving this contrasting and neutral palette of black and white. It reminds me of a night sky along with snow, so I think it chimes in perfectly with the season!
That was easy, right?
So now that the DIY pencil Christmas trees are all painted up, let’s have some fun staging them in different ways to ramp up your Christmas decor!
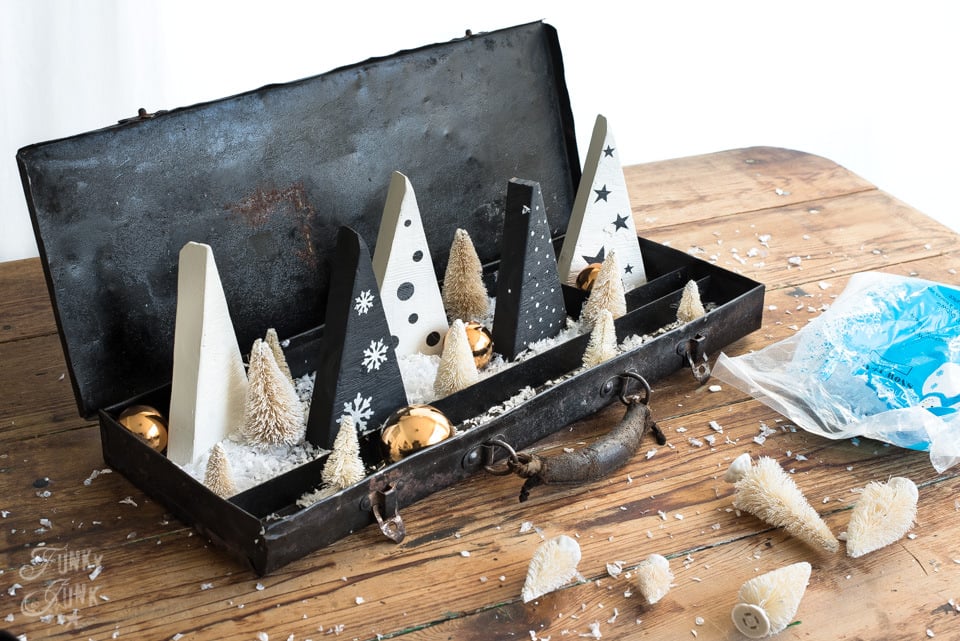
Since these sweet little wooden trees are so compact, you can either stage them by themselves, or placer them in a base of sorts.
I happened to have this shallow toolbox that’s all too perfect for displaying trees in! Here’s how I used it with THESE scrap wood Christmas trees another year…
The trees were positioned inside the toolbox, then a combination of faux snow, white bottle brush trees and shiny copper ornaments surrounded them, making quite a cute display!
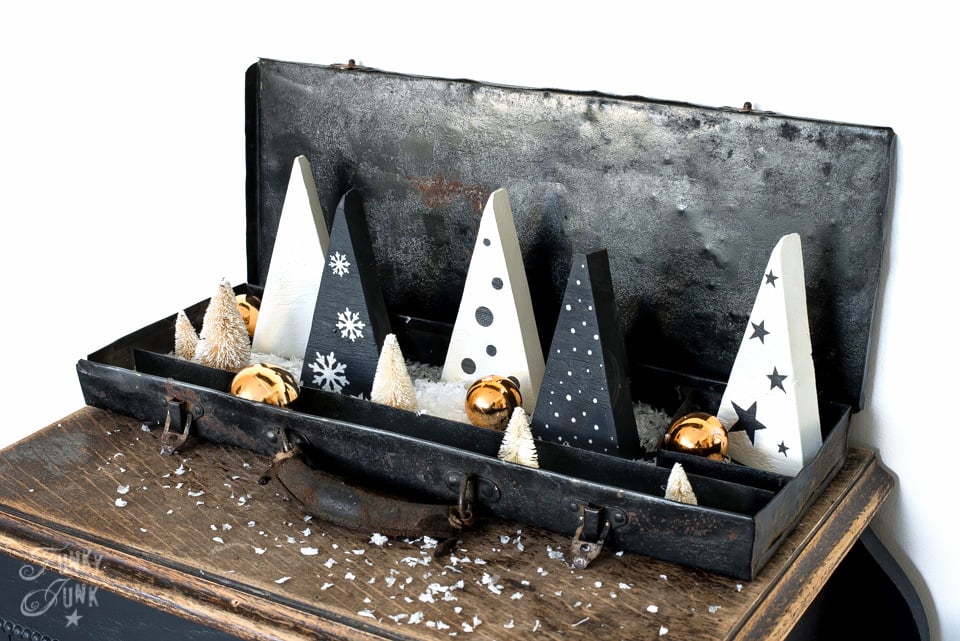
Trees in a toolbox
What a fun little vignette to cart around to different locations such as a table top or window sill.
Don’t have a toolbox? HERE’S how a plank of wood became a base for this cute little tree farm!
These ideas fits the bill nicely if you have surface space.
So how about a vertical challenge next?
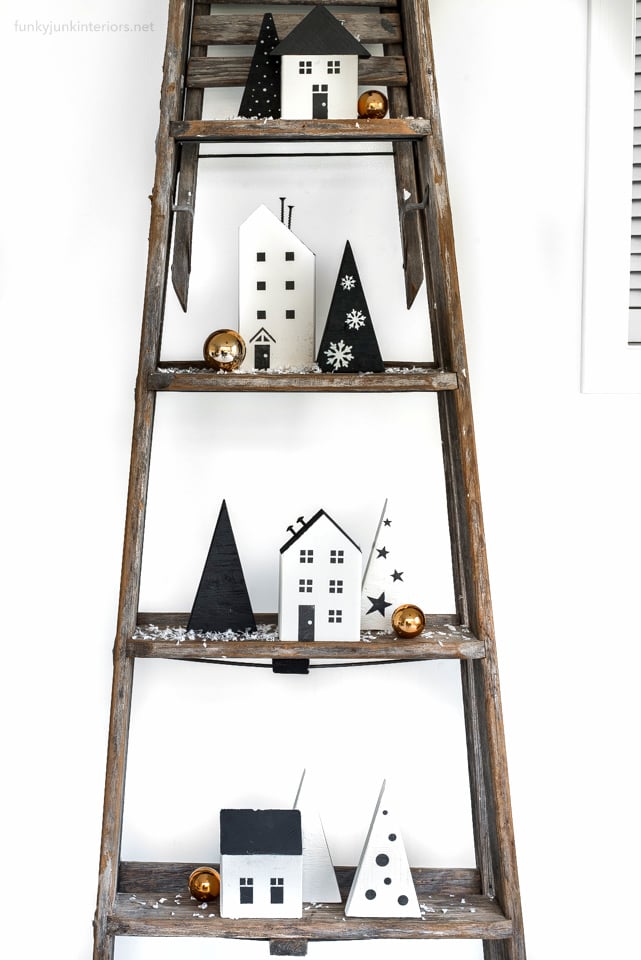
Pencil trees on a stepladder
Staging the pencil Christmas trees on a ladder turned out to work all too perfect! No need to eat up any needed surfaces with this idea!
- lean a wooden step ladder against a wall until the shelves sit level
- stage each step like a mini shelf
- add some faux snow and ornaments as desired
How cute right?! And now I want to show you the final idea I came up with because it’s the cutest of them all!
Other decorating supplies to try:
- wrap trees with small clear lights such as fairy lights
- sprinkle on glitter
- spray on faux snow for a snow-flocked Christmas tree look
- add tiny bows
- hang tiny wreaths
- add a Christmas tree skirt of some type: here’s a PRESENT and here’s a GEAR
Places to stage them:
- entryway table
- window sills
- tuck 1 or 2 beside a bathroom tap
- drill holes in tops and hang as Christmas ornaments
- hang from a wreath
- position them inside garlands
- group them inside a cabinet like I did HERE
- try this wreath idea I did HERE
- along a fireplace mantel
- position in between plenty of branches
- line your stairs
- make large quantities for gifts
- add one to your Christmas wrap
- side table in a living room
- use as a dining room centerpiece
Visit the Christmas Village tutorial HERE
I really wanted them to match the Christmas Village I made in THIS POST. I mean, how fun are coordinating trees to the little wooden houses?! Can you even?
Make sure you take a peek at that post, because there are so many other tree photos to appreciate!
However the trees look darling on their own as well. And during Christmas time, it’s certainly nice to have options, and lots of them!
How would you design and stage these trees in your home? Think you’ll give some a go?
DIY wooden pencil Christmas trees with stencil decorations
Love the look of wooden Christmas trees for holiday decor? Here's an easy way to create wood pencil Christmas trees and easily decorate with the perfect sized stencils!
- Miter saw
- Orbital sander
- reclaimed wood planks
- Pencil Christmas Trees stencil
- dome-tip stencil brushes
- Wider artist paint brush
- Fusion Mineral Paint – Raw Silk
- Fusion Mineral Paint – Ash
- Faux snow
- White bottle brush trees
- Christmas Village stencil (if desired)
-
Position wood plank into miter saw, and cut a 15 degree angle.
-
Flip board over, and cut again, creating a triangle.
-
Keep cutting board until you have all the trees you desire. Lightly sand edges.
-
Paint or stain the trees as desired.
-
Stencil decorations from Pencil Christmas Trees to decorate the trees with.
-
Stage as desired.
-
Make a Christmas Village to match!
Other wooden Christmas decorations to make:
Make a Christmas Village from 2x4s and stencils
Check out 12+ wooden Christmas trees to make from one post!
Visit all other DIY Christmas tree ideas HERE
View Comments (1)
These are so cute and you put them to such good use. Once again, I wish I had access to a saw and keep meaning to stop by the local building supply company to see what they might have in their free bits and bobs.