Learn how to build a handy screwdriver organizer with 1 scrap piece of wood! Easy to make, quick to grab, that helps keep your workshop organized!
What a summer this is turning out to be! I currently have hired a handyman doing some long overdue projects to the outside of the house that I didn’t feel I could do on my own. And it’s giving me new life. Literally.
Al has also guided me on how to do a few things myself, so I’m rather excited to get the pro guidance! It’s like breathing in fresh air again, bouncing off ideas with another that gets it.
I’ve forgotten how time consuming it is making big, forever decisions though, and decided rather than fight the process, to take a little time off to work through it all as needed. Let’s just call this my 2020 summer vacation, shall we? LOL
But thanks to landing two doors on the curb, one thing led to another and I have a new workshop update! What a super happy fluke.
So during the little reshuffle, I decided to tackle a mini workshop organizing project I’ve wanted for YEARS anyway!
Catch up with the workshop series at:
.
All workshop projects to date HERE
Workshop table – before
.
On the far end of my workshop, I have lots of large apparatus that sits on the floor. A beast of a compressor, plus an equally large pressure washer is normally stored under a makeshift workshop table made from two sawhorses and a few boards along the top.
The table clears the machines, and provides a top, but I’ve never loved the uneven, slightly warped boards.
And then I landed the PERFECT sized door on the curb that fit this area. It was totally meant to be.
It was painted a semi-gloss white to match the other workshop tables and turned out absolutely gorgeous!
But I couldn’t bear plunking all the tools back as-is. It was time for a little workshop tool reorganizing and beautifying.
However there was one thing I’ve wanted forever… and that was easy access to screwdrivers upon sight. I thought perhaps hanging them from the pegboard could work, but after not having the right brackets, I decided to just make my own DIY Wood screwdriver organizer from some scrap wood!
Sure would beat digging through a toolbox for them!
And oh my goodness… it ended up exactly what I wanted for absolutely FREE, with of course, a reclaimed look I favour anyway!
So this post shares the outcome of the new work table, AND my pretty DIY wood screwdriver organizer!
If all your screwdrivers are hiding in a drawer, you may want to consider doing something similar.
Here’s what I did:
This post contains some affiliate links in which I earn a small percentage if you purchase anything through these links, at no extra cost to you. Thank-you for helping to support my blog!
Easy and handy DIY wood screwdriver organizer
.
Supplies you’ll need:
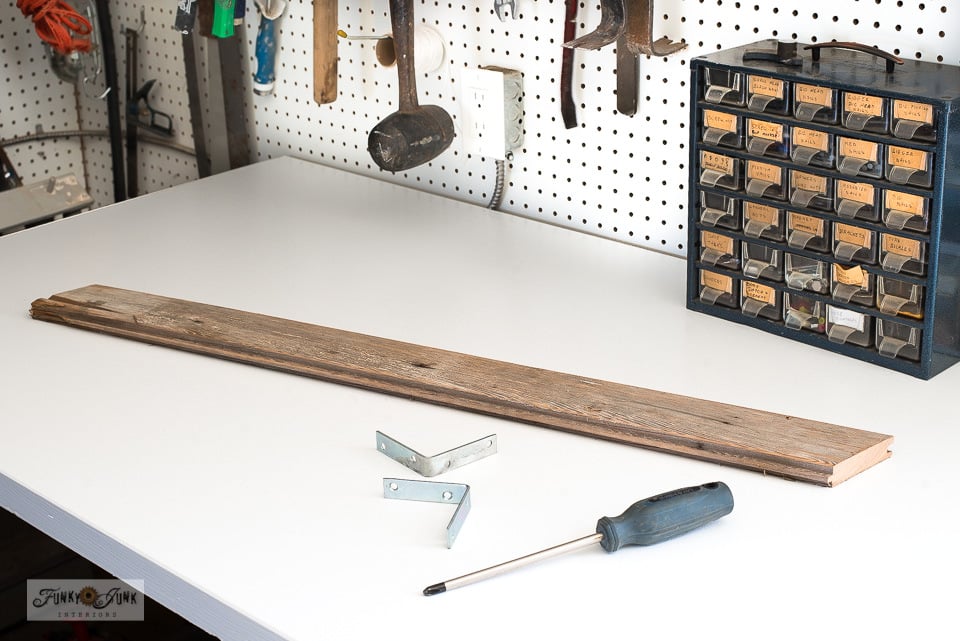
A plank of wood cut to desired length (I ultimately used a chunk of 2×4 measuring 25″ long)
Various drill bits sized to the thickness of screwdriver shanks
Two small L-shaped brackets to fit
Measuring tape / ruler / metal yardstick
Selecting the wood
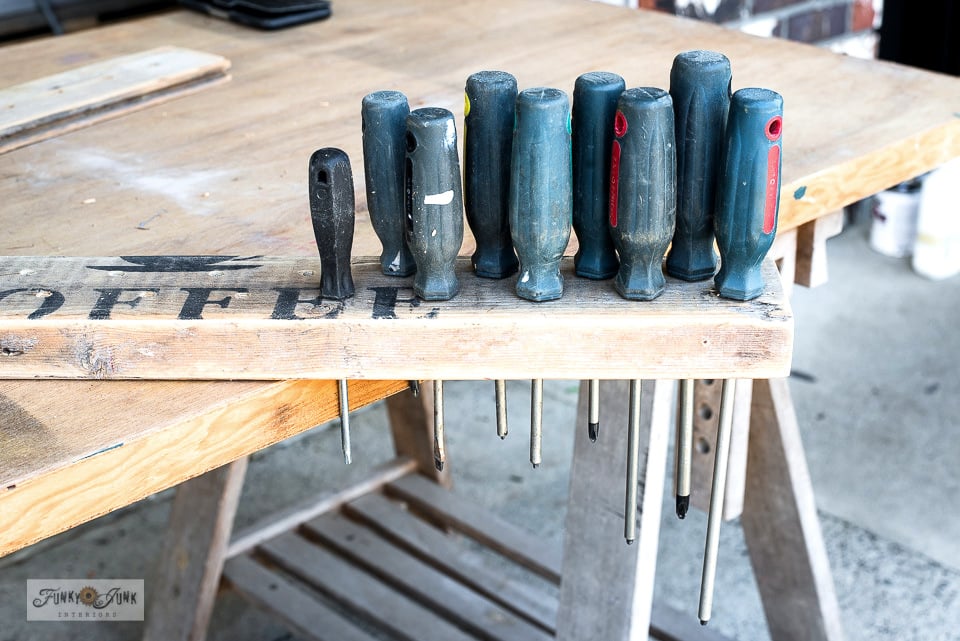
1. Cut wood plank to desired length.
I found using a chunk of 2×4 ultimately worked the very best. It left the screwdrivers standing straighter than a thinner plank did.
Drilling the holes
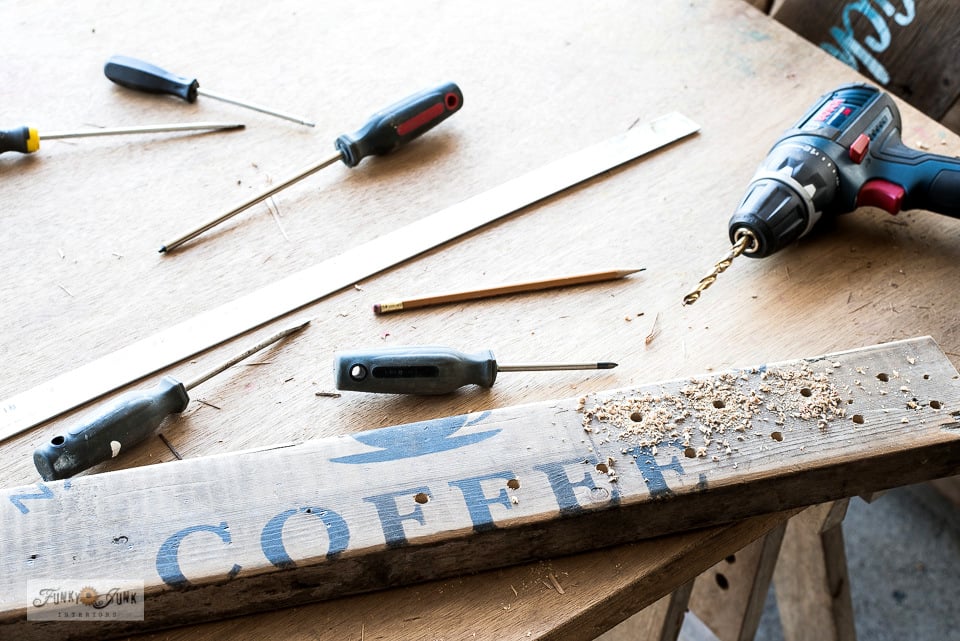
2. Measure, then drill holes 2″ apart.
I decided to drill double holes in a zigzag pattern. It doubles up screwdriver space while still being able to view all the tips. It worked out perfectly!
The board was from a past project using this coffee stencil from HERE
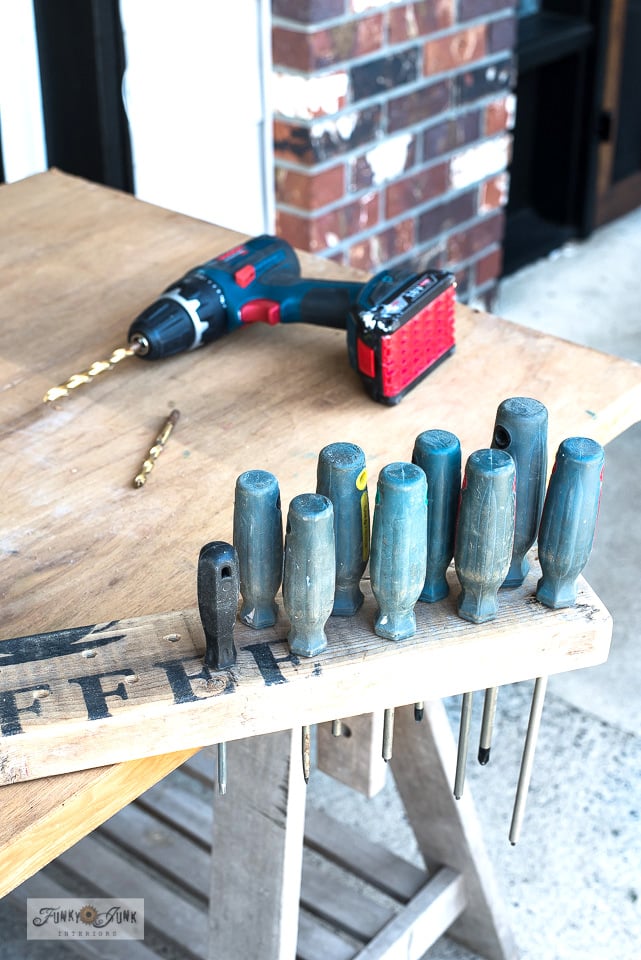
I started drilling holes with with one drill bit size that fit most screwdriver shank sizes, then enlarged some holes with a larger bit to fit the larger shanks. Much less guessing this way!
The 2″ hole placement spacing cleared all the screwdriver handles perfectly without wasted space.
Regardless, a trial on scrap wood for the hole spacing is a good idea to ensure your given screwdriver handles fit.
And now I want all pretty new screw drivers… figures.
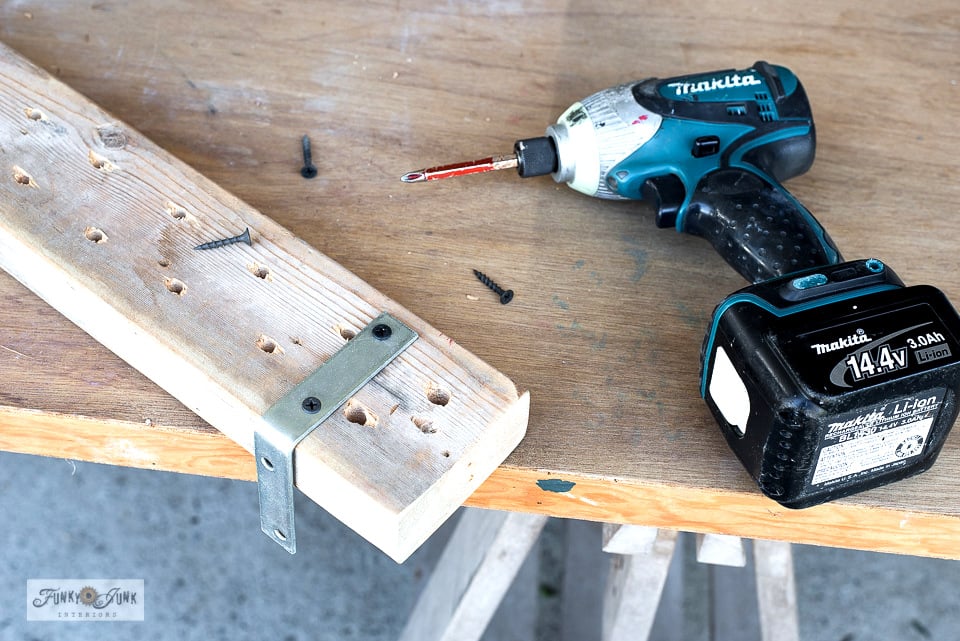
Attaching the brackets
3. Attach L-brackets to board.
These small brackets fit perfectly in between the drilled holes.
I flipped the board upside down, attached the brackets with screws from the bottom.
You could of course mount the L-brackets from the bottom of the shelf as well, however I liked the clean lines of the shanks on their own. Plus, the screwdriver handles pretty much hide the brackets so I felt this was the cleanest look.
4. Screw the L-brackets to the wall.
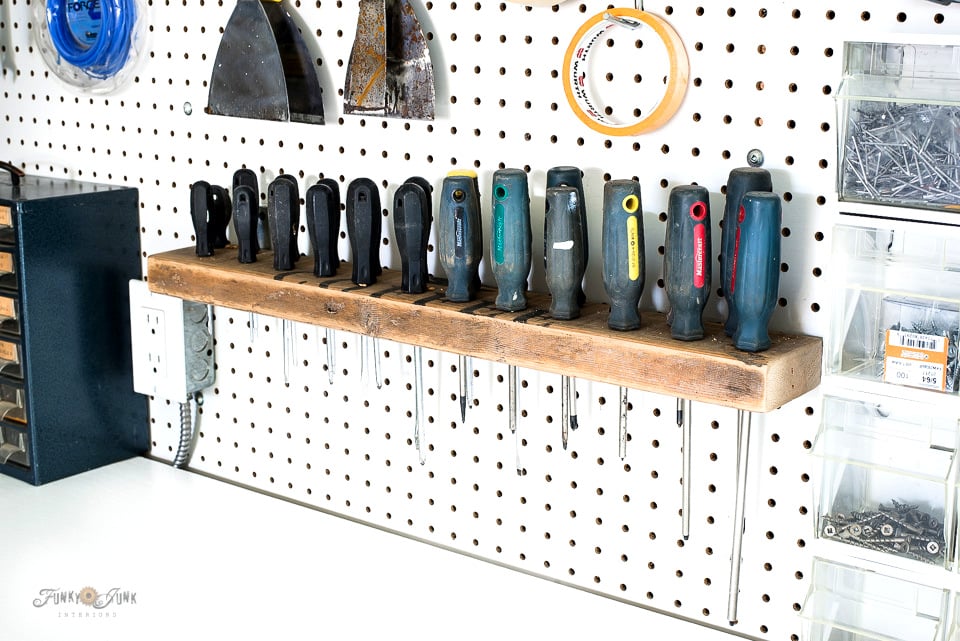
My own workshop wall is partially covered with peg board (spaced away from the wall with strips) which offers excellent storage options and is a very worthwhile workshop update investment.
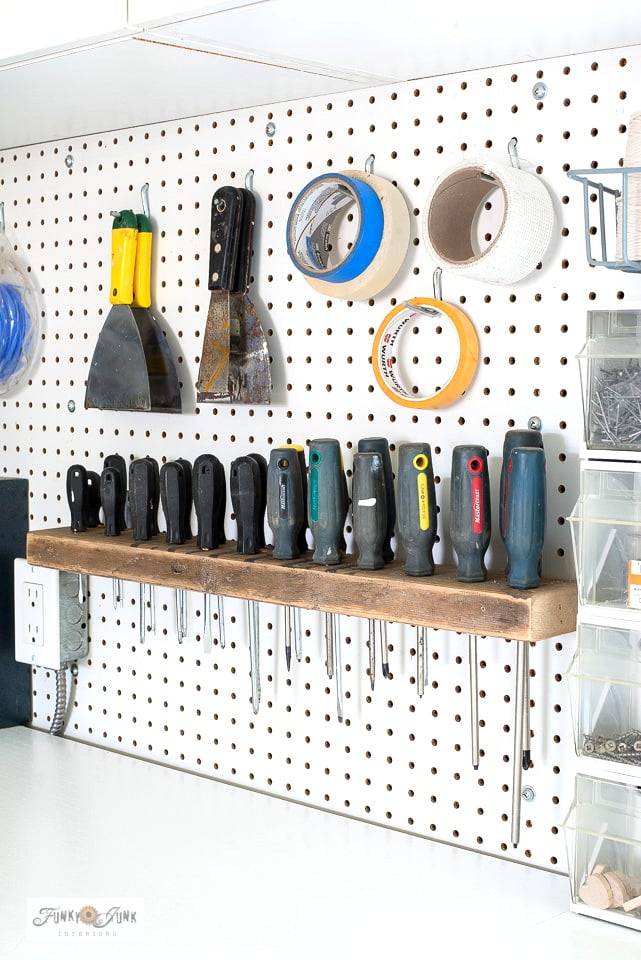
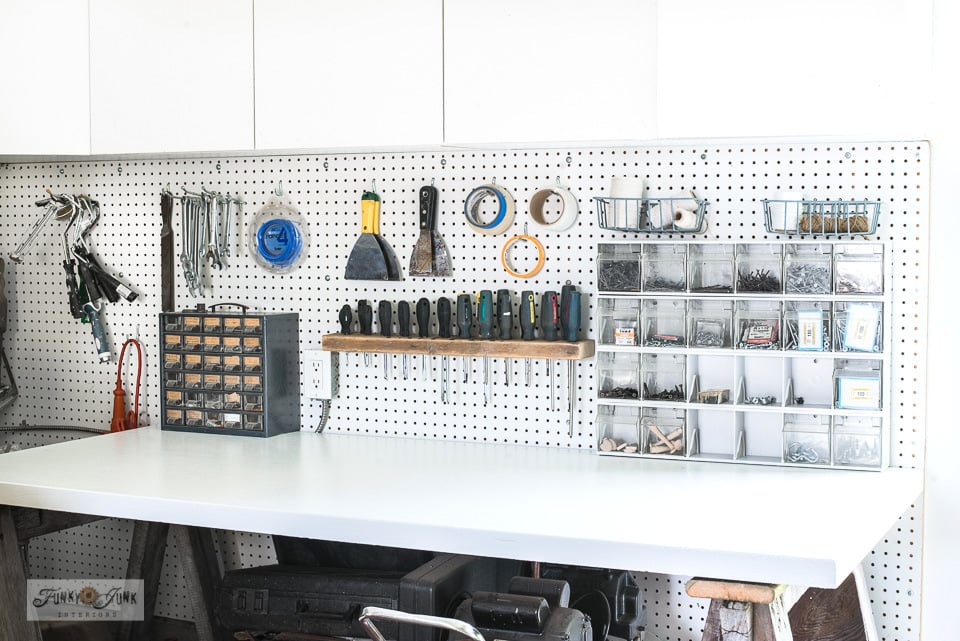
The finished DIY Wood screwdriver organizer
Check out the fresh, clean and beautiful workshop workspace I have now, thanks to the screwdriver organizer!
.
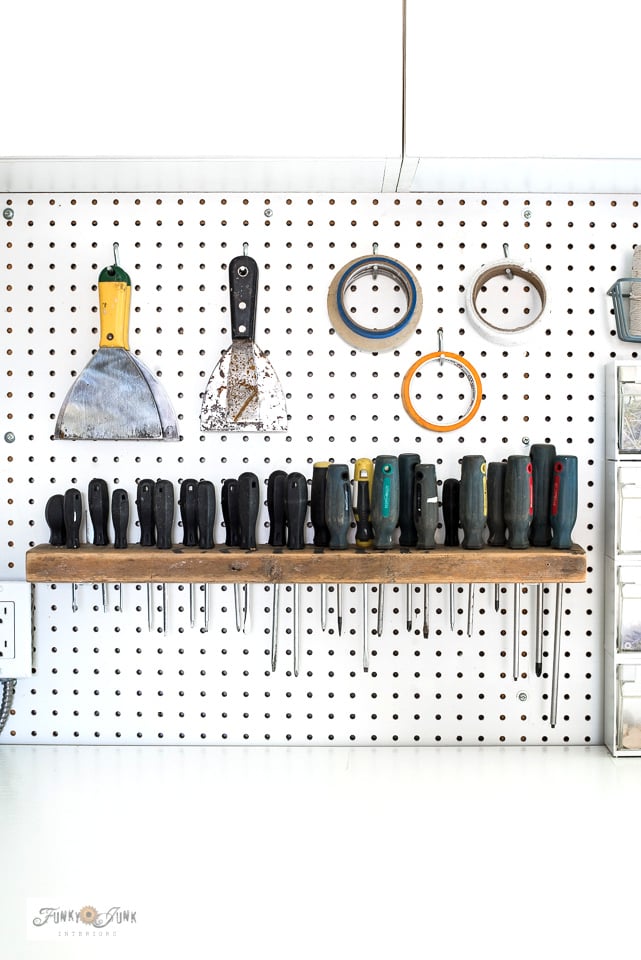
Aren’t the holders perfect? Each screwdriver is so easy to see, with everything in one workstation!
I just LOVE how you can view every single screwdriver tip with this tool screwdriver organizer! And how long they are, from the stubby screwdrivers all the way to the big guys.
Sure beats opening endless tool chest drawers (although still needed) trying to find the one you want! Who has extra drawer space anyway? I sure don’t.
Because you’ll be needing to pull the screwdrivers from the top, I recommend storing small tools etc. above the organizer, if anything at all. Seemed like the perfect place to store masking tape and putty knives.
The double row of screwdrivers seemed to offer more room. They are still easy to look at and grab thanks to the zig zag positioning.
But one old relic came back to the workshop which I will never get rid of.
This was my mom’s vintage metal tool organizer with her hand writing on the labels. I think it’s positively adorable and makes me smile everytime I look at it.
And because there’s nothing better than an epic before vs. after…
workshop table – before
A much prettier and more organized workshop table after… check!
What a difference, huh?! Now that’s a screwdriver rack I can handle.
Could your workshop use a handy (and free) screwdriver organizer like this?
All workshop projects to date HERE
Other workshop organizing projects:
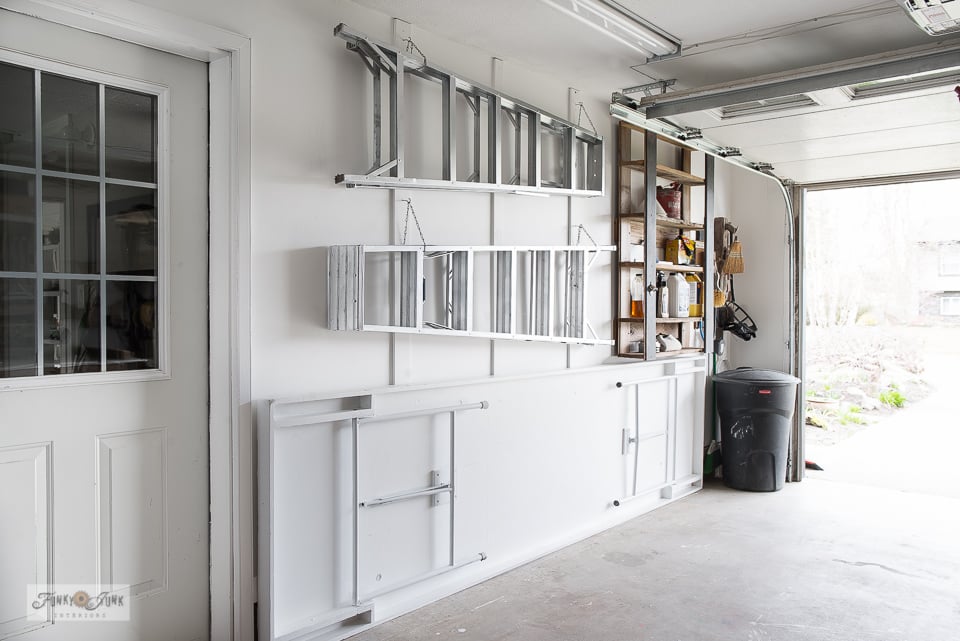
Compact ladder and table storage in a workshop
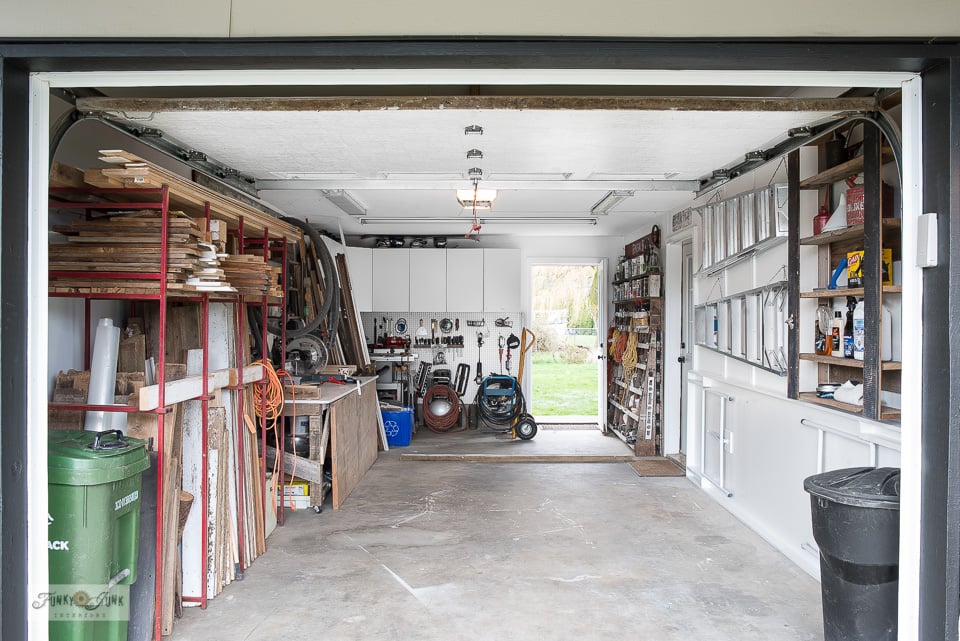
How I turned a single car garage into a fully functioning workshop I can park in!
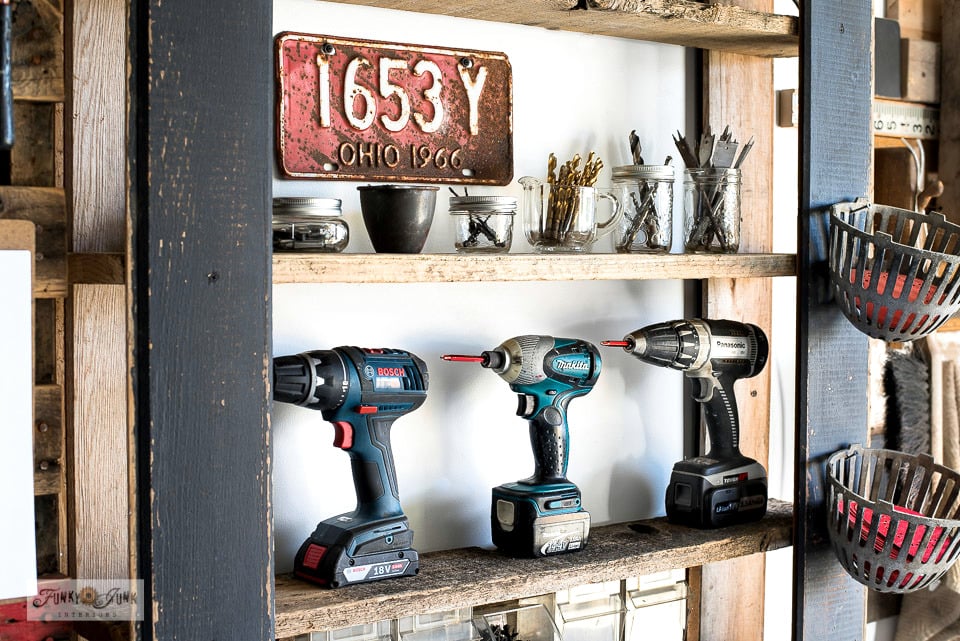
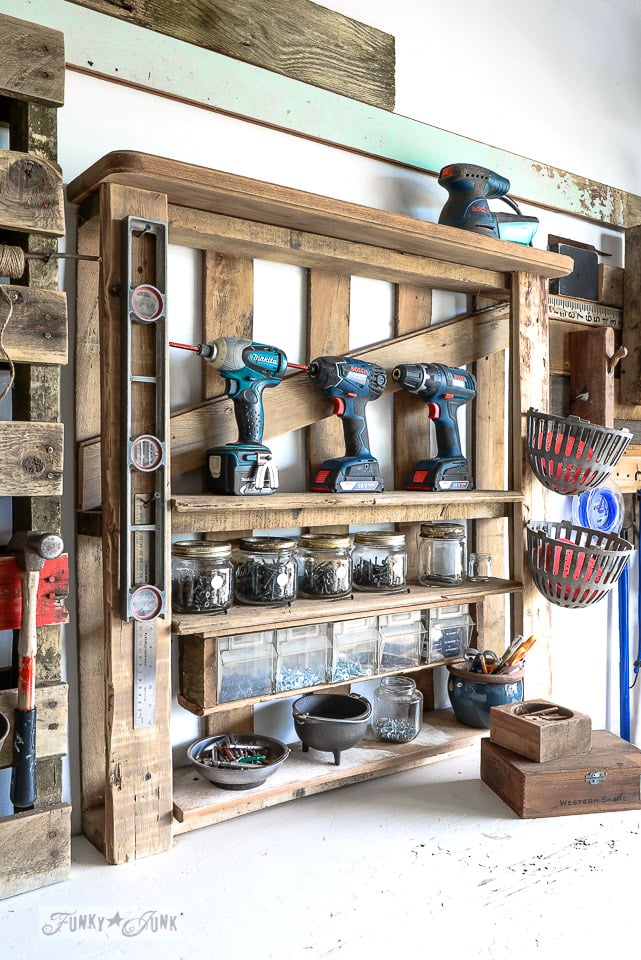
Pallet-styled power drill shelf
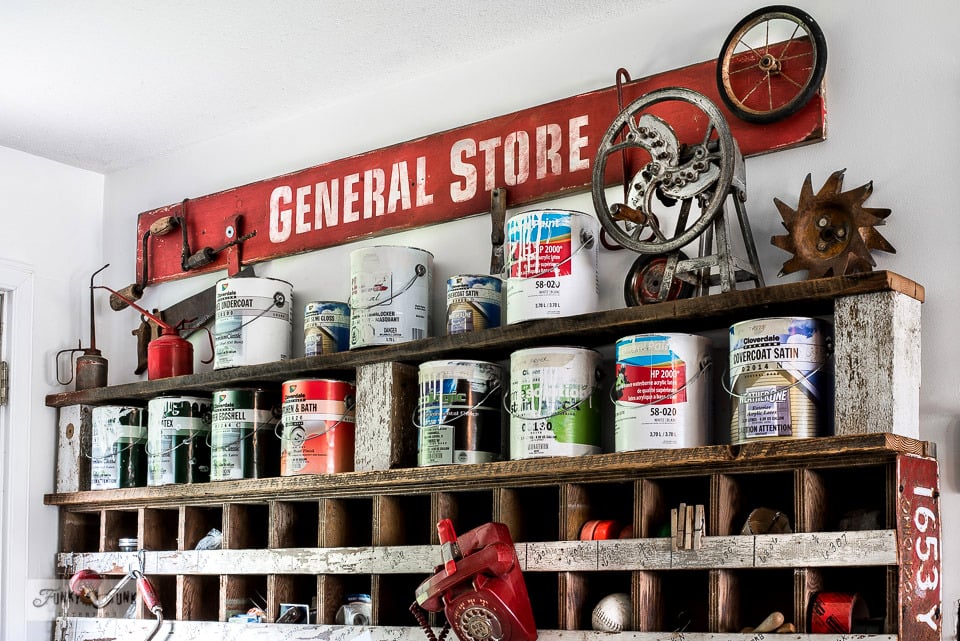
General Store junk organizer with paint shelf extension
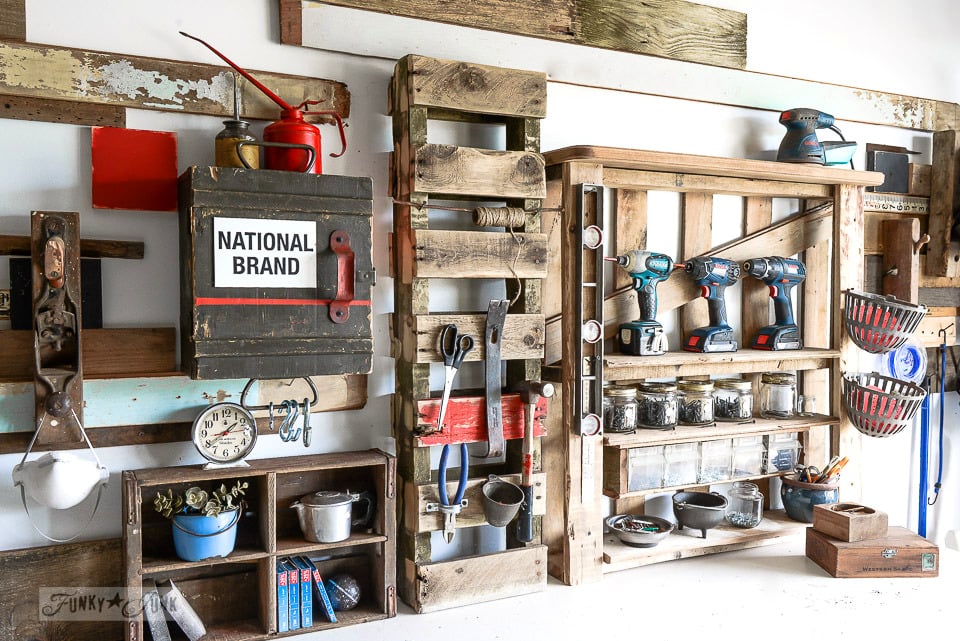
Enhanced pallet tool organizer
Workshop reveal post – take the full tour!
Visit all workshop posts to date HERE
View Comments (9)
Great idea! I think I'll use that one.
I saw someone else to a similar idea with glue bottles so they wouldn't have to wait for the glue to move to the spout.
Thanks Laurie! And that's a really good idea for glue bottles for sure!
Oh my gosh! I NEED this! I spent all day yesterday purging and organizing, my work area. This post is perfect timing Donna. Thank you!
P.S. The new door looks amazing too :)
Thanks Kim! And yes, give it a go if you need it... it's pretty epic!
Just perfect Donna! I've used the old doors as a sewing table. Just removed the door knob and used the hole for the sewing machine cords. Set the door on 2 small drawer cabinets from Ikea and done!
Thanks Sandy! And yes to the predrilled holes for cords! Doors are SO good for worktable surfaces if you can land one that has a smooth surface and fits well!
I LOVE this idea, Donna! We have pegboard too in the workshop and those dang pegs holding our screw drivers are always falling off. This is definitely happening at our house!
Huh! Thanks for letting me know Marie. My patience would have lasted 1 second with that nonsense going on. haha! Back to my 'ol reclaimed wood for the save once again! Yes, just do it. Can't wait to see your variation!
I've been meaning to pop around for weeks now and tell you how much I love this idea. So perfectly rustic and functional to boot. We used your idea this weekend to make one for our garage too. I was getting so tired of trying to hunt down the screwdriver I needed and this is perfect. Now they're all in one happy place :-)